Note that our on-site printing solution is made to handle last-minute registrations and reprinting badges with typos. It is not designed to print all badges on-site for large events. We suggest ordering pre-printed badges for the majority of your attendees.
So you've received your on-site print kits and you're ready to print your last-minute attendees.
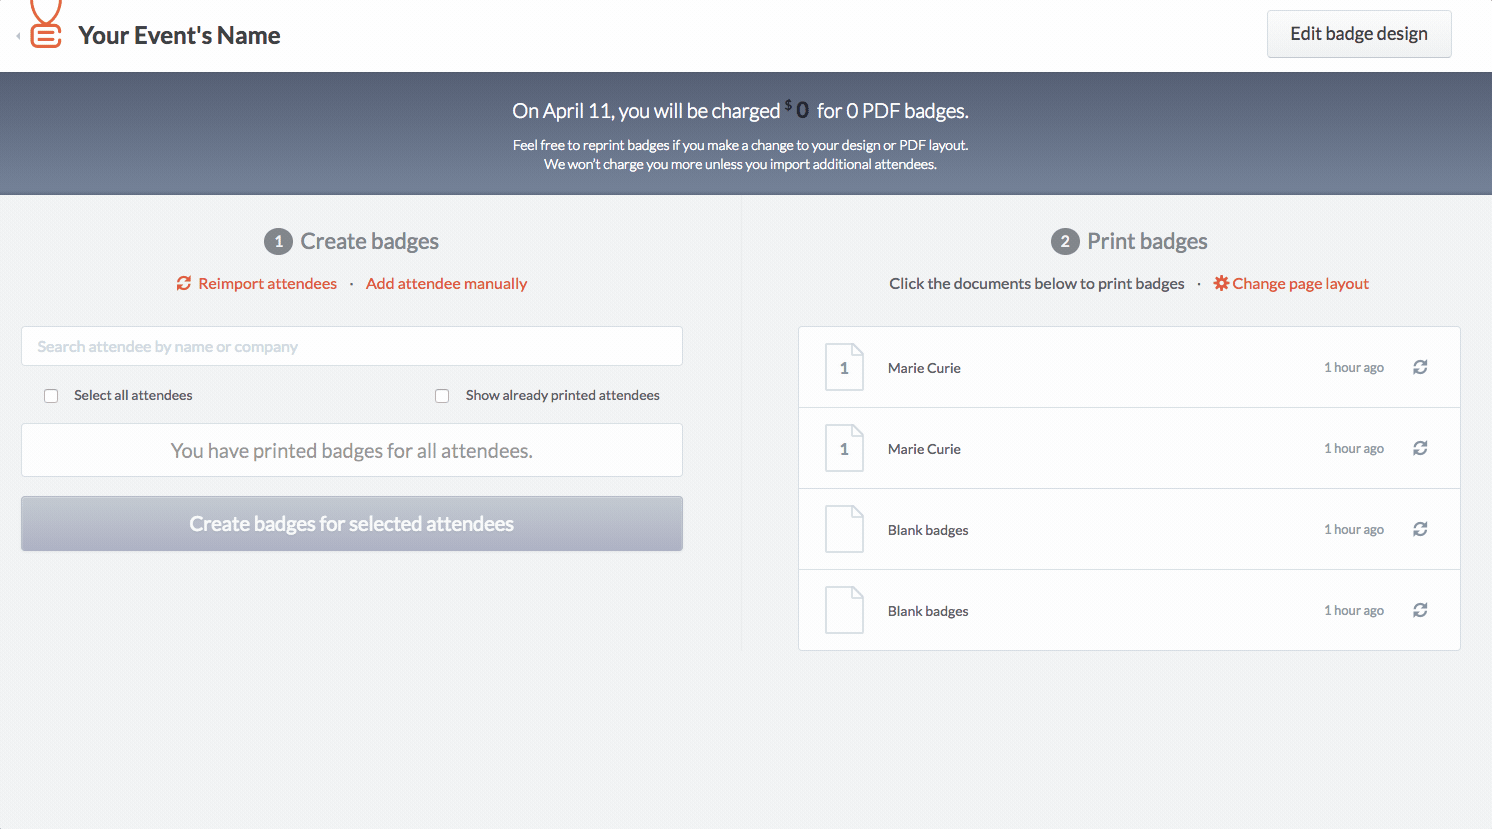
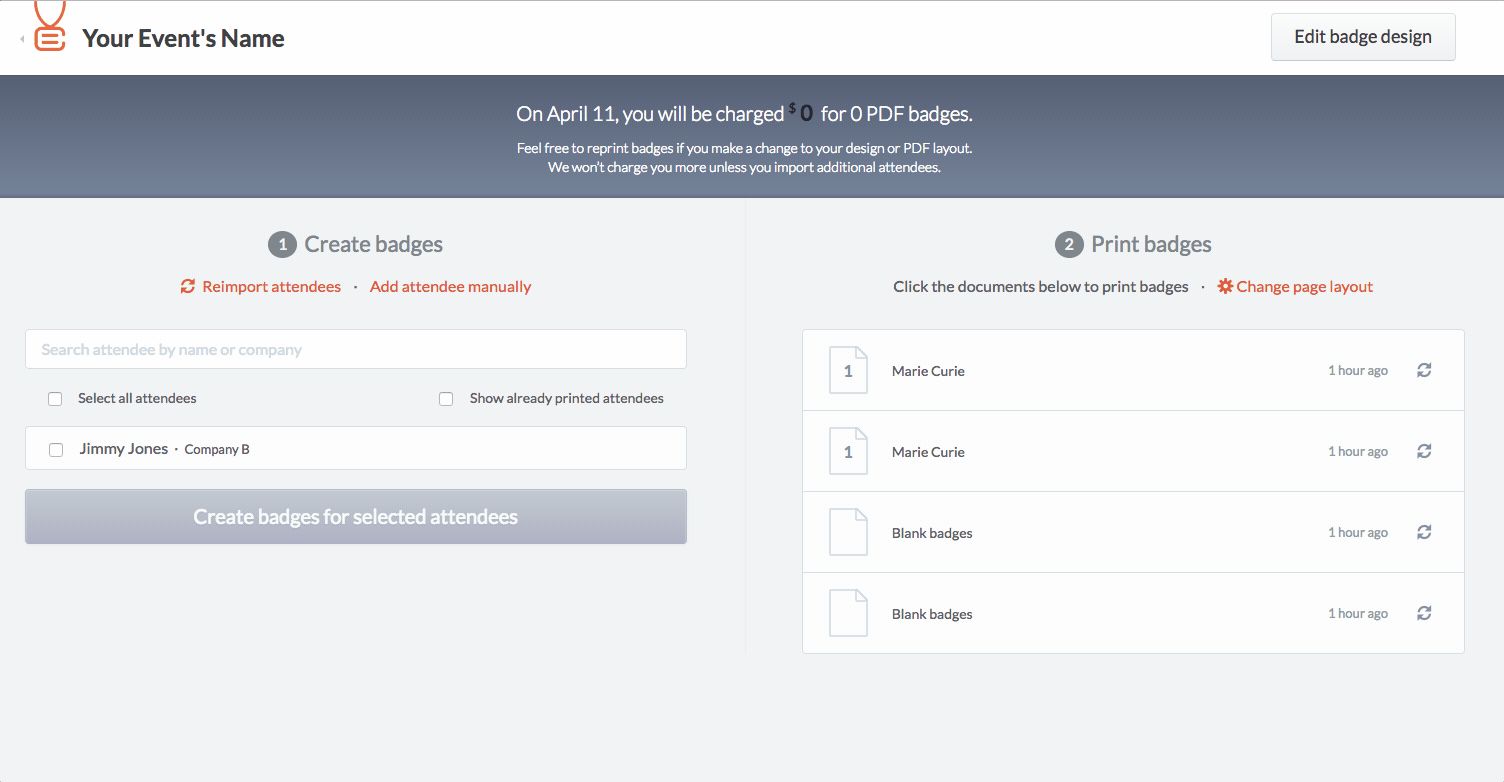
It's quite easy. Let's suppose one of your guests registered a few minutes ago and we need to print their badge. First we'll manually add them to the system.
Then we need to format the page layout to create a PDF with the on-site print kit specifications. Normally the page layout has been updated to CB-1 for 4"x3" badges or CB-2 for 6"x4" badges for you. You might want to check, If for some reason it isn't, here's how to do it:
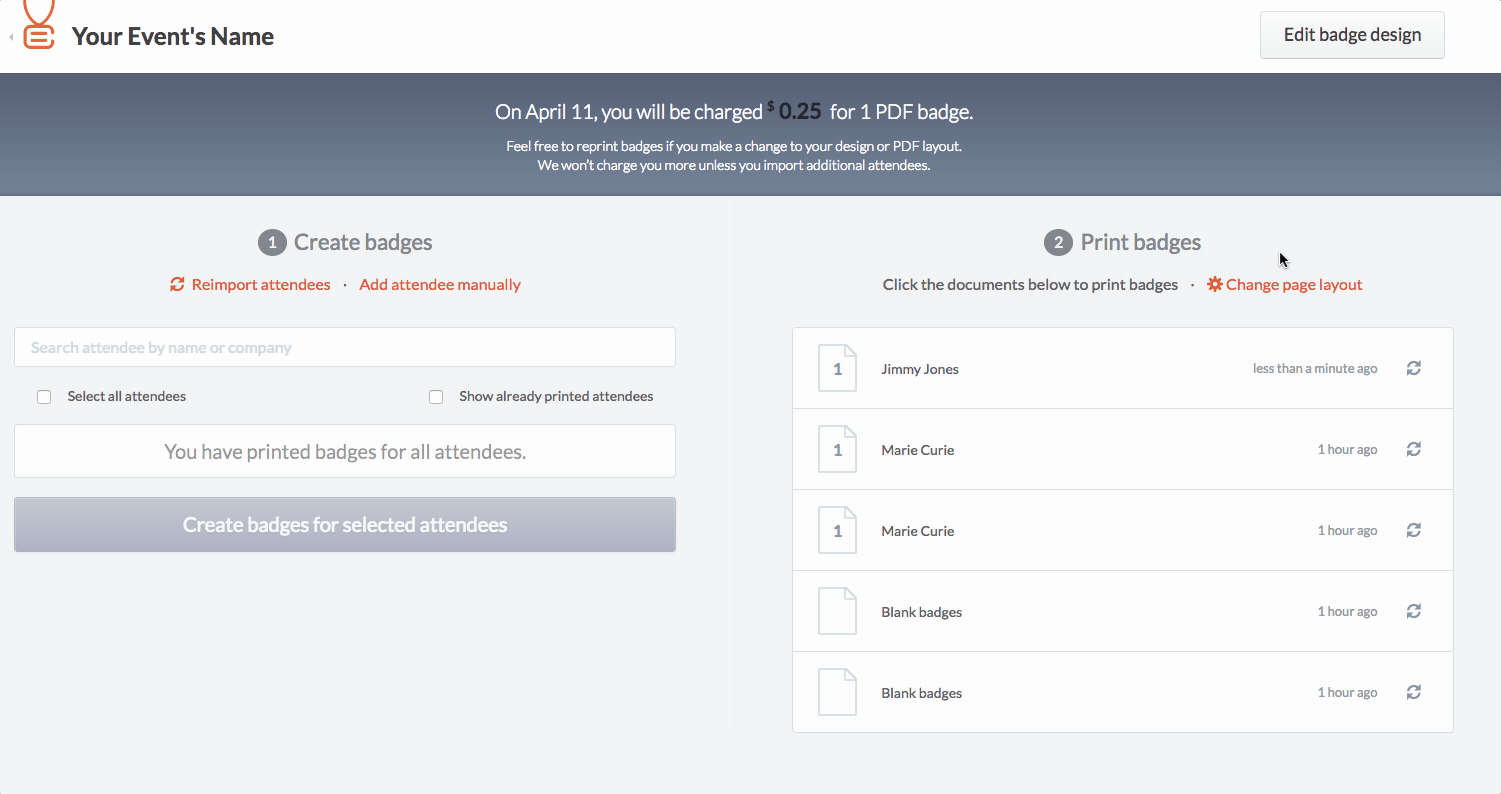
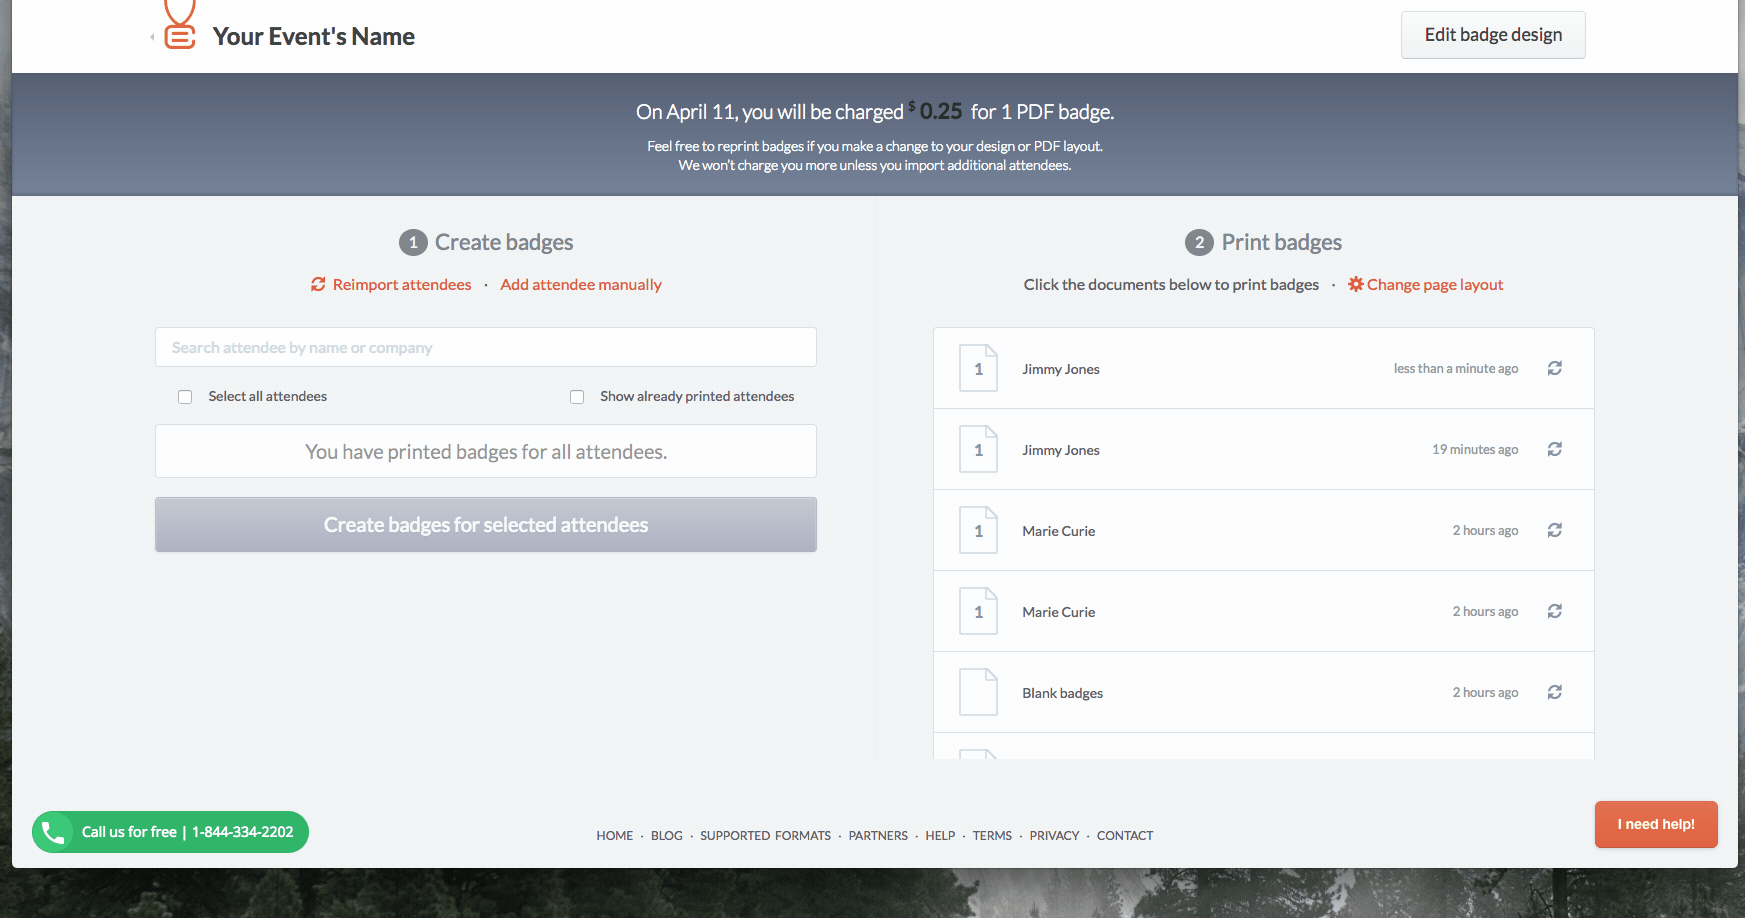
Now we have to generate the PDF document to then print the badge.
Then we click on the document and open the downloaded file.
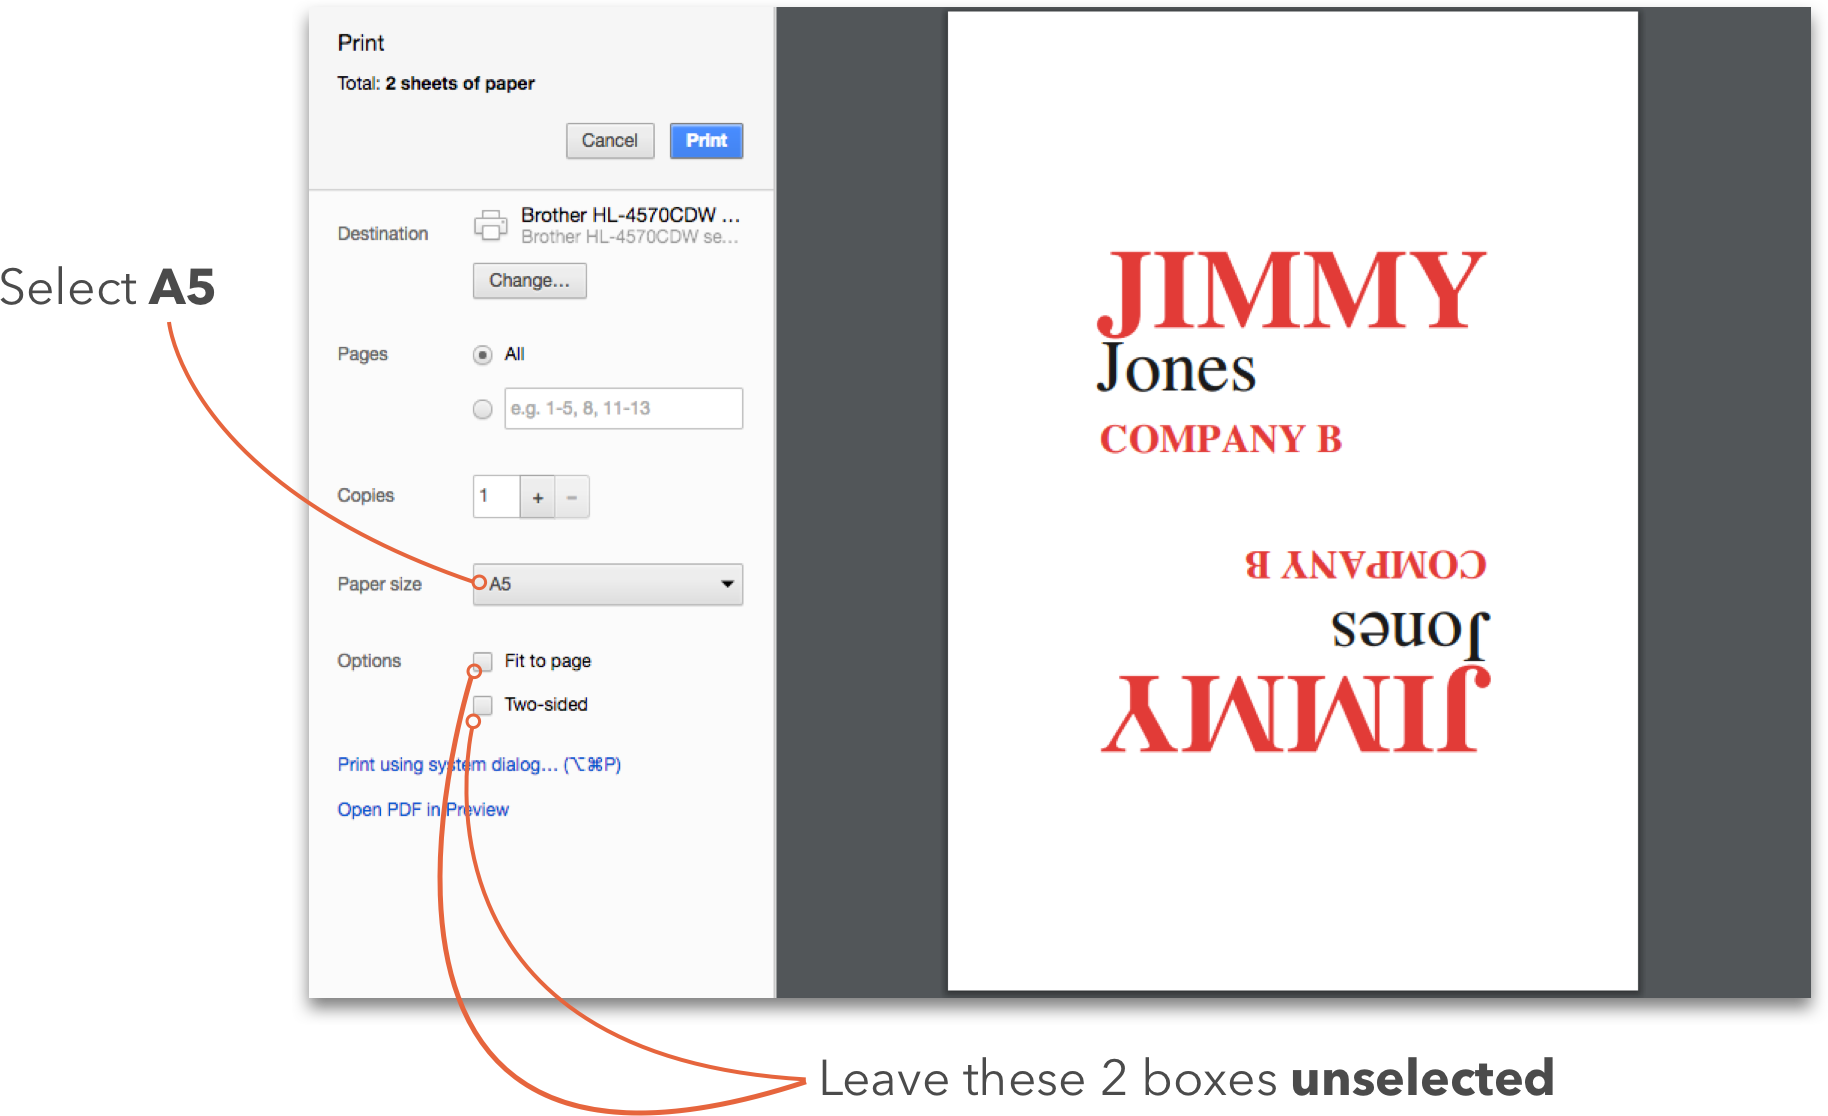
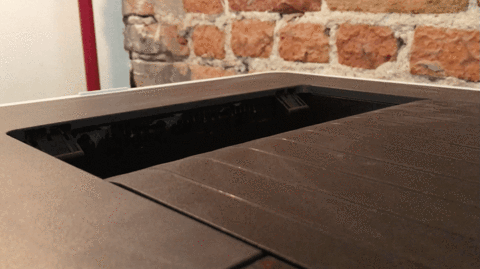
Before printing, make sure your printer's paper feed or tray table is adjusted to accommodate A5 paper for 4"x3" badges or US letter for 6"x4" badges size sheets.
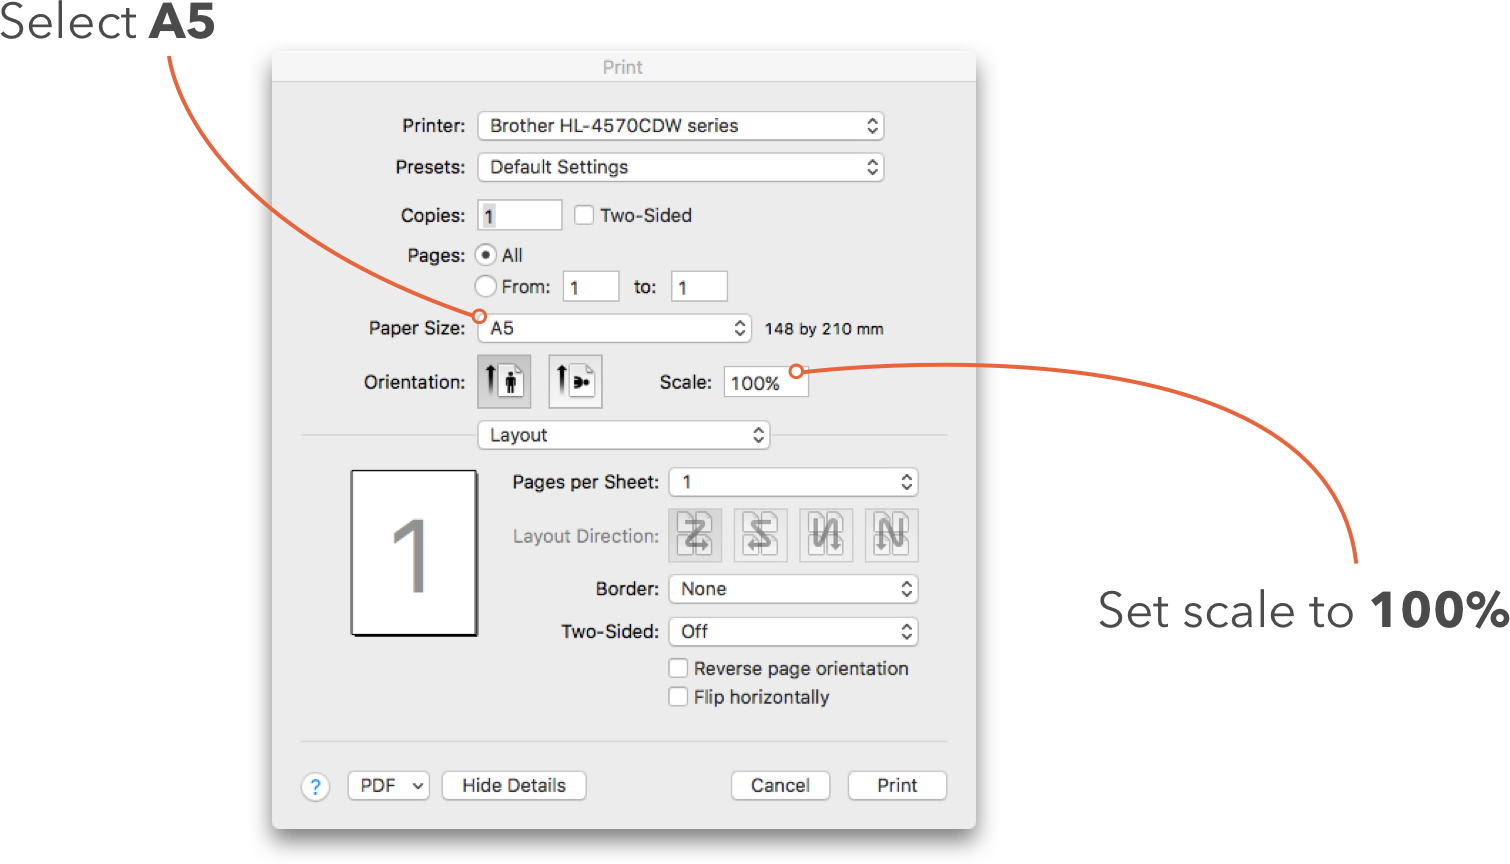
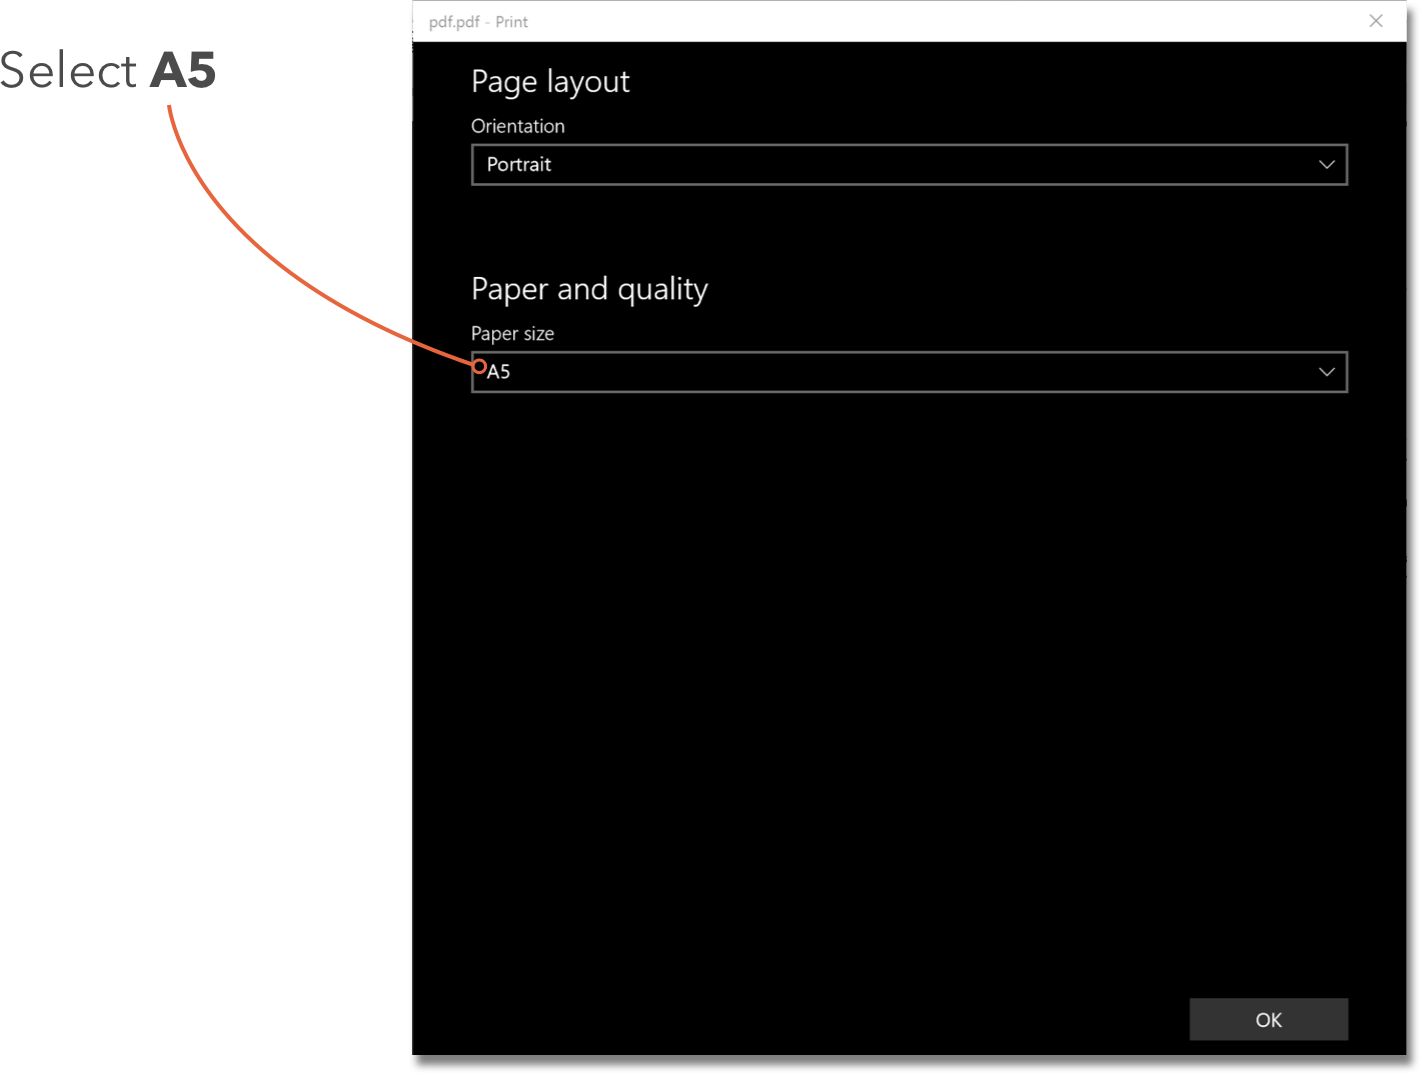
Make sure to set your computer print settings to Paper size: A5 for 4"x3" badges or US Letter for 6"x4" badges and Scale: 100% (or Actual size).
Chrome print settings:
Mac OS print settings:
Windows print settings:
Now we can print.
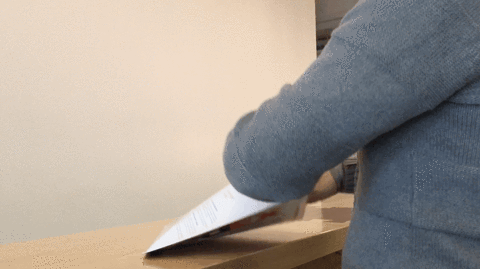
We then fold the micro-perforated edges and take them off.
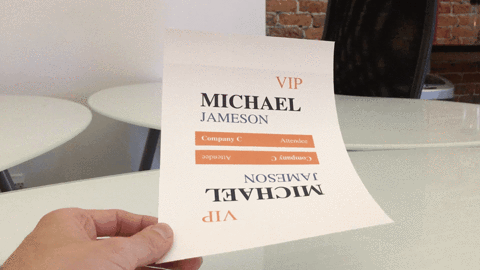
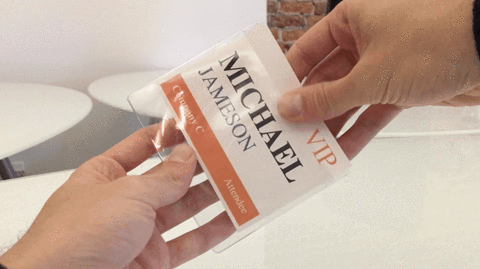
Now only one thing left to do. Insert it into the badge holder. And bam! Done.